
Existing options
To
Thus you are compelled to fit some form of auxiliary grip. My Simms boots have two manufacturer options of Aluminium star cleats and gold star cleats. At the time I bought them, I could only get the aluminium cleats and have to say they work well improving the grip in slippy areas somewhat. The big issue is you only get a pathetic, 10 to a pack and being they screw in directly to the sole of the boot, the screws can work loose or be pried off and you lose them.
So Whats new with Rocktreads?
So this is where we come to Rocktreads another aluminium grip for any make of wading boot.
In essence, these are simply soft though quite thick, Aluminium discs. You fit these in any desired pattern to the wading boot. The method of fitment however is the USP. Instead of relying on a conventional self-tapping screw into the sole that can pull out, these are literally bolted in to the boot using a countersunk bolt which fixes in permanently to a threaded insert. As you can see if you examine the photo above, you get a lot of bolts and sufficient discs to configure your boots as you see fit. You do though have to get your hands dirty. Fitting them, will require you to drill a lot of holes in your nice wading boots and you might understandably be a little apprehensive about this! I know I was.
While my boots are less than a year old, at least having a little wear on them I didn’t feel quite so precious about them as maybe I would if tackling the install for the first time in brand new unused boots
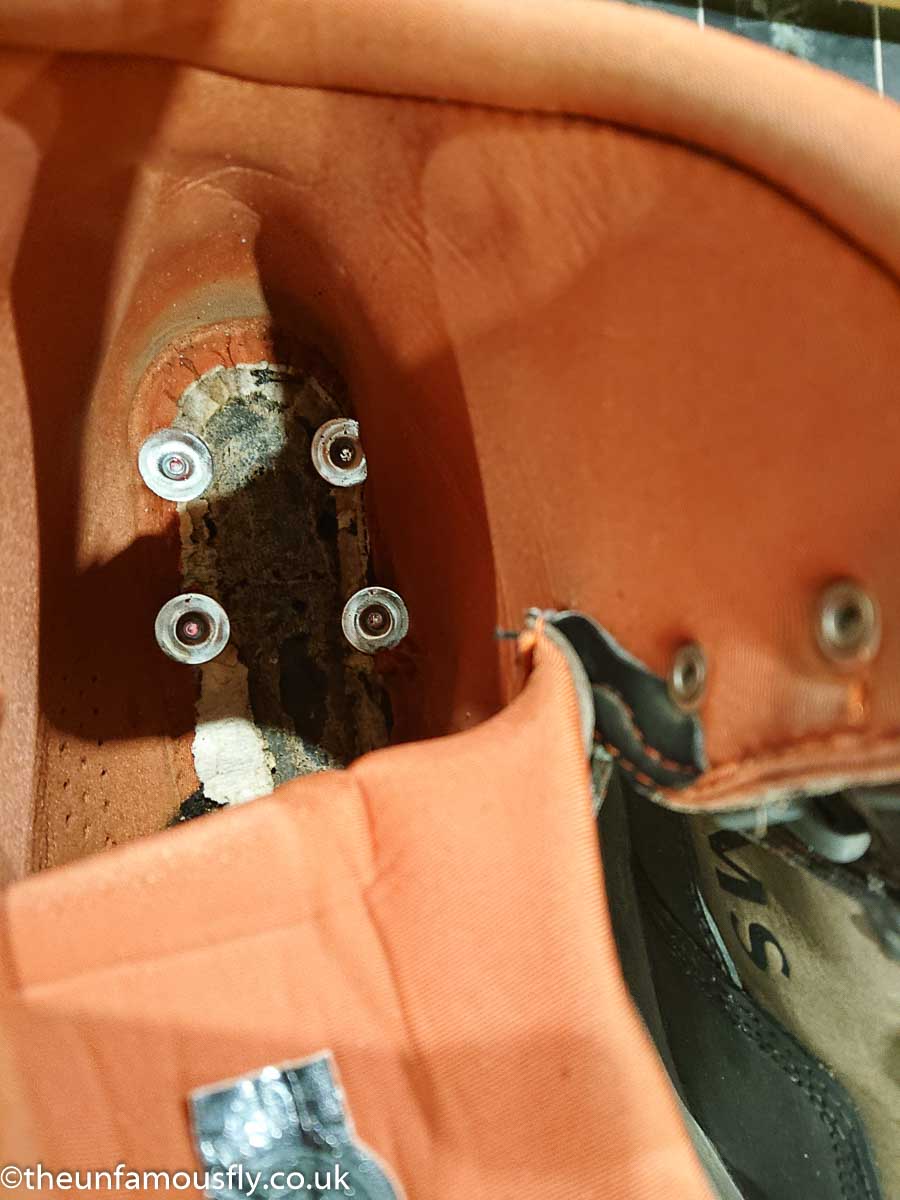
Rocktreads inside boot
Inside of boot showing inserts in sole.

Rocktreads halfway there
First set installed on a boot, one to go! If you do it in the house I hope you have an understanding wife!

Simms Wader boot insoles
Despite the Rocktreads instructions, with care, the Simms insoles CAN be removed intact. When you drill your first hole don’t press through too hard and the drill bit will push the insole away enough to let you get a grip of it.

Rocktreads All fitted
My Rocktread installed in both boots, just awaiting reinsertion of the insoles
Rocktreads: The Install
The installation is well documented both in a set of fitting instructions supplied with the kit, but also online where you can watch a video as one of the
I won’t go through the entire process
Rocktreads: Installation Tips
- Time: Allow plenty of time. This is not a two-minute
job , doing it for the very first time will take you probably two to three hours ( not including curing time for the thread lock). - I found once I had done the first boot I was much quicker on the second. You will waste less time sizing up bolts, and will get the knack of getting
screw and insert aligned quickly. - Insoles: Rocktreads
mention that most boots have removable insoles except Simms. As a result, they say you will need to get a new set of insoles. Any kind of insole for footwear will do. I didn’t need to replace mine. When you drill the initial hole ( I started at the heel end as I could see what I was doing, and reckon most people will too) don’t push the drill too farthrough . Just enough to be through the sole and pushing the insole from below. You will find it is enough to allow you to get a gripof the edge of the insole. Now very carefully prise the insole adhesive away from thefoot bed , and your insole will with a littlepulling and what feels like ripping come away intact. You can glue it back later with Impact adhesive. - Drilling Holes: Pay VERY careful attention to where you are drilling. You will drill from the outside in and you need to note that the sole is generally wider on the outside than on the inner. On my boots even bringing a drill a full inch in from the edge of the sole at the heel, and drilling through straight, brought the drill through at the very edge of the inside of the boot, catching the boot lining. You might want to angle the drill in towards the middle of the boot a little especially at the heel, to ensure you have sufficient space for the insert to fit.
- Ream out the hole: With each hole do several passes with the supplied drill, really ream the hole out to get excess rubber away. Don’t oval the hole just make it clean as possible.
- Aligning the inserts: The kit comes with a couple of extra long bolts to help with alignment. Once you have drilled your hole and removed loose rubber, push the long screw through from the outside so you can feel it on the inside. Get your insert and align the end of the insert with the end of the
screw . You neednot screw the two togetherin fact once you havethreadlock in the insert it is best if you don’t. Just get the screw on the end of the bolt and push the screw out with the insert, it will bed down nicely into the drilled hole. Now you can introduce the aluminium disk with a properly sized screw, screw it into the hole, keeping your finger on the insert so it is still aligned the same way as it was when the long bolt came out. - Be generous with the threadlock: I was probably a bit sparing at first as you worry you might run out, Actually, there is quite a lot and you can be quite profligate with it on each fitting.
- Let the Threadlock cure: Once you are finished let it all cure for a few days and then refit your insoles. No matter how dry you think your boots are, once you remove the insoles I bet they are still damp, leaving the insoles out a few days will let it all dry out ready for final gluing back of an insole.
- Make sure the inside is dry: While you should only do this job in dry boots, despite three of four days on the radiator in the house, I found on removing the insoles the material in the sole was still fairly damp, and round the inside of the boot lining. Before you refit the insoles make sure it is all dried out well.
- Refit the insoles: if like me you are able to reuse your insoles you can either glue them back in, using impact adhesive, or in some boots I beleive the insoles remain loose- up to you,
First Impressions
They add quite a bit of weight to the boots. I noticed this right away when trying them on after refitting the insoles. This may not be a problem to most people, with my arthritis and knee problems I was a little apprehensive. I am very sensitive to heavy footwear and it doesn’t take me long to start to feel it. However if my first outing is anything to go by, I need not have fretted!
I opted to head up the River Carron into Carron Glen to give the Rocktreads a try out. There are a lot of round boulders and slippy moss exacerbated by the canopy of trees that cover this natural fissure in the land.
Wading here, regardless of method of traction is not always easy so I felt it was a suitable test for these. As there is a little bit of a walk to and from the fishing spots too it was a chance to assess how they fared in simply moving about.
The few steps across the asphalted car park felt a bit odd walking on the new aluminium disks and you think you are going to go for a skite initially as they feel a bit like walking in football boots with studs in, I never actually slipped or skidded, it’s just I think the noise of the disks on the ground gives you the impression of having impaired grip. You don’t in actuality.
Once on the steep gravel path into the glen though they were fine and I had no issues with slipping or sliding, and arguably the lose surface was inviting such issues. They didn’t happen. The first spot I tried was silty on the way in then big round slimy boulders and right away the Rocktreads gave me confidence they were working. Where I definitiely would have been wary of my traction, they were giving me a noticable advantage over both the bare vibram ( which would have been impossible to use here, and with the old Star cleats fitted. I suffered barely a slip and moved around about as well as I ever could excepting for my own restrictions of knees and other aches and pains!
I walked up the river and the next area was the gravelly tail out of a pool with intermittent boulders breaking things up. This would be easy wading in most boot types and the Rocktreads were no impediment, everything was fine, similarly on the silty slope of the edge of the pool, they were no worse or better than any other boot type here. Once again over big round boulders they really do dig in remarkably well and give impressive grip. The only slip I had was actually on bone dry rocks which were coated with a film of green moss, more a colouring to the rock than actual visible moss , caused for the most part by being under the shade of trees in a damp environment.
To be fair these rocks were large and very round, over 2 foot across boulders where at no time would your foot be flat to the surface. This seemed to be the only area grip was a little less than ideal and I suspect in felts it might have been similar. There is a little bed rock round here too and I experienced no issues. Bedrock tends to be the surface that really tests traction on wading boots and it just never did with the Rocktreads.
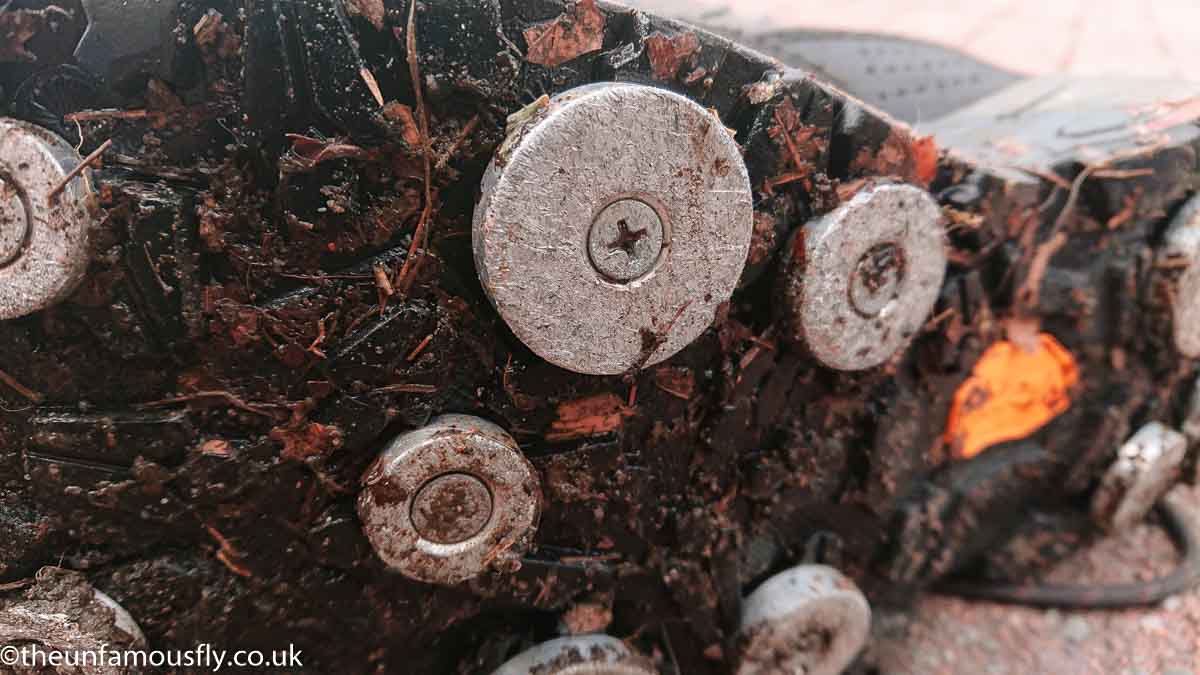
What I was most happy with though after my outing was that all the disks/studs, call them what you will, were all present and correct. None lost and no visible signs of being in imminent danger of losing any.
Summing Up
A bit of a job in fitting and in some ways a little bit scary taking a drill to your likely, not so cheap wading boots. With care the Simms liners can be removed and replaced. Other boots are apparently not an issue on this front. Once fitted and cured they are apparently nearly impossible to remove due to the industrial threadlock. Once you have fitted the them to one boot the second….and subsequent I guess if you were doing this regularly, would be easy enough. Just allow time for drying out the boots before commencing, fitting and final curing. All in you need four or five days between outings unless you have access to drying facilities that let you get the dry out of the boots done faster.
In use they do add weight to the boots but in practice it never caused me any issue though this was a concern for me in particular. Most anglers won’t notice I suspect, I am just a wee delicate flower with “issues”. Very effective in the water they dig in way better than anything I have used to date on wet slippy boulders and bed rock, which are the areas most anglers are prone to coming unstuck.
I will report more as time in use develops but so far very happy with my Rocktreads and they get my recommendation if you can lay your hands on a set in the UK.
More Information and where to get yours?
If you want to read more about Rocktreads and see material on how to fit and where to buy in the USA have a look at Rocktreads.com
They have info, reviews and helpful tips.
If you want to purchase your own Rocktreads they are now available via online tackle and hook supplier The Barbless Hook Company.
Note: This is an unsolicited review of an item of tackle purchased by The Unfamous Fly and no promotion or sponsorship of the item under review was offered.




Personally i would rather go barefoot than have all the hassle of fitting them
I guess thats a viewpoint Tommy! I think maybe going barefoot is a bit extreme.
As most anglers tend to gravitate towards Felts many will see these as unnecessary, I chose Vibram soled boots this time beacsue I think they are better on the places you arguably spend more time, on the bank walking ( have had quite a few falls in felts) and Vibram soles are definitely a more eco-concious choice too ( some places in US and New Zealand have also banned felts now). They aren’t as good as felts on slippy rocks though and need some auxiliary grip. Traditional screw ins just don’t last. Longer term it would be interesting to see if Rocktreads can license their solution to the wader boot makers or maybe launch their own, with the fittings already prefitted. It’s not the worst job in the world just takes a couple of hours and the time either end prepping and finally curing, you only need to do it once. I think in the US dealers will do it for you.